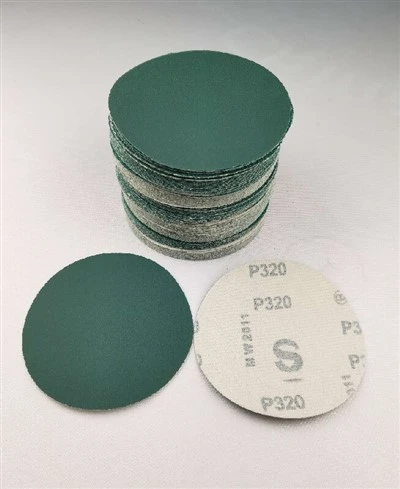
Hey there, fellow DIY enthusiasts and professional grinders! I'm a supplier of Best Grinding Discs, and I'm stoked to share some tips on how to install the best grinding discs correctly. Whether you're a newbie or a seasoned pro, getting the installation right is crucial for safety and optimal performance. So, let's dive in!
Why the Right Installation Matters
First off, you might be wondering why it's such a big deal to install your grinding disc correctly. Well, a poorly installed disc can lead to all sorts of problems. It can cause uneven grinding, which means you won't get the smooth finish you're after. Plus, it's a major safety hazard. A loose or misaligned disc can fly off the grinder during operation, and that's definitely not something you want to happen.
Choosing the Right Grinding Disc
Before we even get to the installation part, you need to make sure you've got the right grinding disc for the job. There are different types of discs for different materials and applications. For example, if you're working with metal, a 4 Inch Metal Grinding Wheel is a great choice. It's designed to handle the tough stuff and give you a clean cut.
On the other hand, if you're dealing with softer materials like wood or plastic, a Resin Grinding Disc might be more suitable. These discs are more flexible and can provide a finer finish.
Pre-Installation Checks
Once you've got the right disc, it's time to do some pre-installation checks. First, take a close look at the disc. Make sure there are no cracks, chips, or other signs of damage. A damaged disc is a ticking time bomb, so if you spot any issues, don't use it.
Next, check the size of the disc. It needs to match the size of your grinder. Most grinders have a specific diameter and arbor size that they can accommodate. Using the wrong size disc can be dangerous and can also damage your grinder.
Tools You'll Need
To install the grinding disc, you'll need a few tools. The most important one is a wrench. This is used to tighten the nut that holds the disc in place. Make sure you've got the right size wrench for your grinder.


You might also need a pair of safety glasses and gloves. Safety should always be your top priority when working with power tools, so don't skip this step.
Installation Steps
Now, let's get to the actual installation process. Here's a step-by-step guide:
- Turn off the grinder: This might seem obvious, but you'd be surprised how many people forget to do this. Before you start working on the grinder, make sure it's completely turned off and unplugged. This will prevent any accidental starts and keep you safe.
- Remove the old disc (if applicable): If you're replacing an old disc, you'll need to remove it first. Use the wrench to loosen the nut that holds the disc in place. Once the nut is loose, you should be able to pull the old disc off the arbor.
- Clean the arbor: Before you install the new disc, take a moment to clean the arbor. Use a clean cloth to wipe away any dirt, debris, or rust. This will ensure a good fit between the disc and the arbor.
- Install the new disc: Place the new disc on the arbor. Make sure it's centered and sits flat against the grinder. Then, put the washer on top of the disc. The washer helps to distribute the pressure evenly and keeps the disc in place.
- Tighten the nut: Use the wrench to tighten the nut that holds the disc in place. Make sure it's tight, but don't over-tighten it. Over-tightening can damage the disc and the grinder.
- Do a final check: Once the disc is installed, give it a quick spin by hand. Make sure it rotates smoothly and doesn't wobble. If you notice any issues, stop and double-check your installation.
Post-Installation Testing
After you've installed the grinding disc, it's a good idea to do a quick test run. Plug in the grinder and turn it on at a low speed. Let the disc spin for a few seconds and listen for any unusual noises. If everything sounds good, you're ready to start grinding.
Safety Tips
Throughout the installation process and when using the grinder, always keep safety in mind. Here are some safety tips to follow:
- Wear safety gear: As I mentioned earlier, always wear safety glasses and gloves when working with a grinder. This will protect your eyes and hands from flying debris.
- Keep a safe distance: Stand at a safe distance from the grinder when it's in operation. This will reduce the risk of injury if the disc breaks or flies off.
- Follow the manufacturer's instructions: Every grinder and grinding disc is different, so make sure you read and follow the manufacturer's instructions. This will help you use the equipment safely and effectively.
Conclusion
Installing the best grinding discs correctly is essential for safety and optimal performance. By following the steps outlined in this blog post, you can ensure that your grinding disc is installed properly and ready to use.
If you're in the market for high-quality grinding discs, look no further than our Best Grinding Discs. We offer a wide range of discs for different applications, so you're sure to find the right one for your needs.
If you have any questions or want to learn more about our products, don't hesitate to reach out. We're here to help you make the right choice and get the most out of your grinding experience.
References
- General knowledge about grinding discs and power tool safety.
- Manufacturer's instructions for various grinders and grinding discs.